
What Café Storefronts Can Teach You About Timber Corbels on Your Own Porch
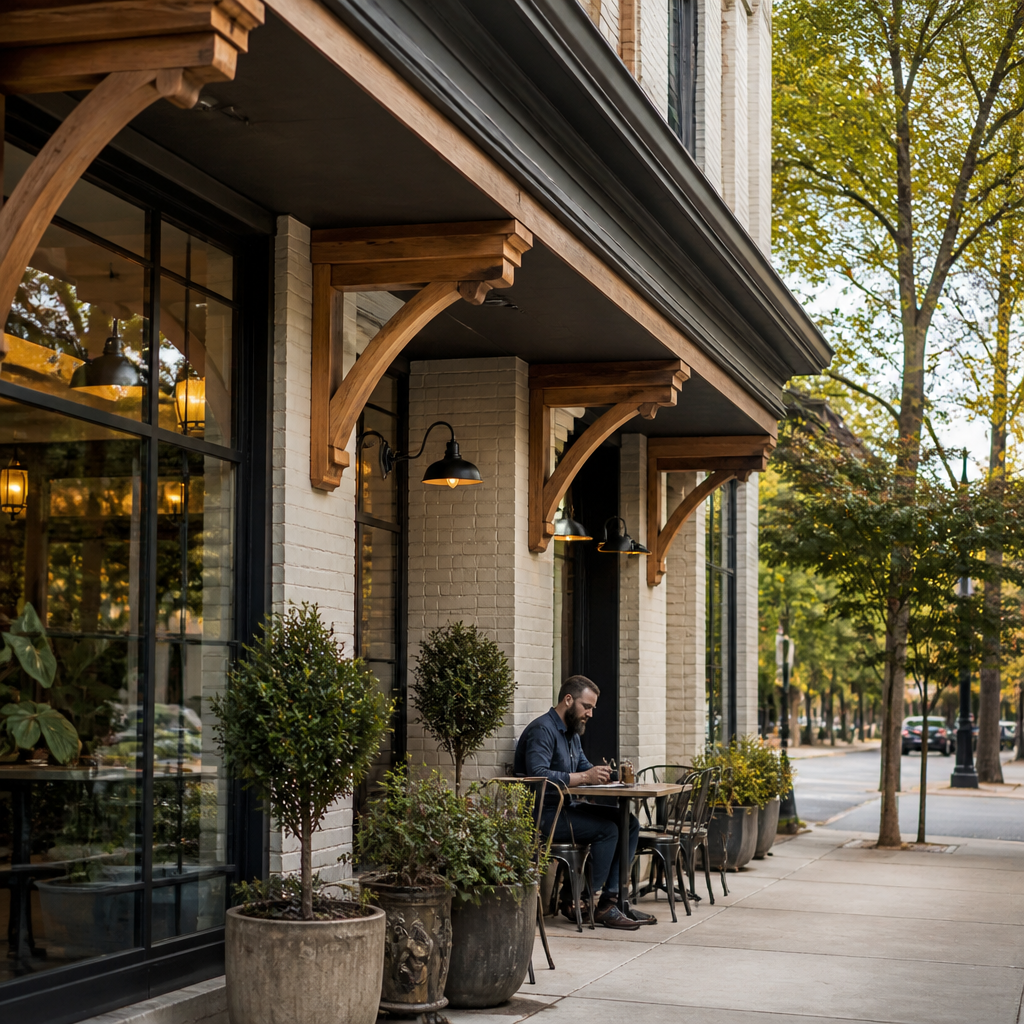
Spend ten minutes waiting for a latte and look up. Half the coffee shops worth photographing owe their charm to a handful of chunky wooden parts: a bracket under a projecting sign, a pair of corbels carrying a shade canopy, a diagonal brace tying a post to a beam over the patio. None of those pieces are expensive theatrics. They are small, repeatable details that make a flat facade read as built rather than applied. The same logic transfers to a house, and it is one of the few exterior upgrades that costs little in square footage and pays back immediately in curb appeal.
Why Small Timber Parts Change a Whole Elevation
A gable end, a garage header, or a shallow entry roof usually fails for the same reason: nothing explains how the overhang is held up. The eye wants a visible transfer of weight. Corbels and brackets supply that explanation. Set a pair of six-inch-thick corbels under a window hood and the hood stops looking like a plastic shelf. Run braces from a porch post up to the beam and the whole frame reads as a structure with intent, even if the actual loads are carried by framing hidden behind the trim.
Scale is where most do-it-yourself attempts go wrong. Thin, scroll-cut brackets bought in a bundle look like fretwork from thirty feet away and disappear entirely from the street. Timber accents want mass. As a rough rule, a corbel under a two-foot overhang should project roughly two-thirds to three-quarters of that overhang and be at least as thick as the post or trim it visually supports. Thicker is almost always better than longer. The Craftsman and Tudor houses people actually stop to look at tend to use pieces in the four-by-six to eight-by-eight range, not one-inch stock.
Field Research Over Morning Coffee
Before you draw anything, go collect examples. Commercial storefronts are the best free design library you have, because chains and independents alike invest heavily in the first eight feet of facade — the part customers see while queuing. Photograph brackets under awnings, note how deep the shadow line falls, and measure what you can reach. If you want an empty sidewalk and good raking light for photographs, go at opening time; a quick look at the posted Starbucks hours for your neighborhood will tell you when the patio is still quiet and the low sun is doing the work for you. Shoot straight on and at a forty-five degree angle, since corbels live or die by the shadow they cast.
While you are looking, pay attention to repetition. Good facades use one bracket profile at two or three sizes rather than three different profiles. Pick a single geometry — a simple ogee, a stepped block, a plain chamfered taper — and let the spacing do the rhythm. Wide architectural work has been moving the same direction for years, as the projects collected in Architectural Record’s survey of diverse approaches to building with wood illustrate: exposed timber is being used as honest structure and texture, not as decoration pretending to be something else.
Choosing the Right Species for Weather
Exterior timber has one enemy worth planning around: moisture cycling. Species choice decides how gracefully a piece handles it.
- Douglas Fir — stiff, strong, and the classic look for heavy timber work. Takes a stain beautifully; wants a protected location or a disciplined finish schedule.
- Western Red Cedar — light, dimensionally stable, naturally resistant to decay. A good pick for brackets high on a gable where weight and movement matter.
- Bald Cypress — a traditional southern choice for wet exposure, comfortable with humidity and splash.
- White Oak — dense, tight-grained, and tough where a piece will be touched, bumped, or carry visible wear.
- Teak — the premium option for coastal and full-exposure work, with excellent stability and little drama when left to silver.
Also decide early between solid beams and box beams. Solid stock gives you real end grain and real mass, and it will check as it dries — a cosmetic trait in heavy timber, not a defect. Box beams are hollow assemblies that mimic the same dimensions at a fraction of the weight, which is often the smarter answer for a long header spanning a garage opening or anything mounted high.
Sourcing Pieces That Actually Fit
Standard-size brackets rarely match a real house, because real overhangs are never the catalogue dimension. That is the argument for made-to-order work: you send the opening width, the projection, and the post size, and the profile is cut to suit. Shops like TarRiver — Tar River Timber Works, based in Oxford, North Carolina, and shipping across the USA — handcraft decorative and structural timber frame accents including braces, brackets, corbels, posts, solid and box beams, headers, shutters, and mantels, along with outdoor living structures such as pergolas and pavilions and custom teak work. Their material list reads like the shortlist above, which matters when you are matching a cedar porch or trying to keep white oak consistent between an interior mantel and an exterior header. Anything that will genuinely carry load should still be reviewed by an onsite engineer; a shop can cut a brace to your drawing, but only someone standing at the building can approve what it holds.
Installation Details That Decide the Outcome
Keep Water Moving
Most exterior timber failures are detailing failures. End grain is a straw — it drinks. Seal all end grain before installation, including cuts you make on site, and leave a small gap or a sloped top surface wherever water could pond. Avoid mounting a corbel tight into a horizontal dirt trap; a quarter-inch standoff or a kerf drip detail keeps capillary action from wicking moisture into the joint.
Fasten to Something Real
Locate framing, not sheathing. Heavy pieces are typically hung on structural screws or threaded rod into blocking, with the fastener heads plugged or counterbored and capped with matching wood. Stainless or hot-dipped galvanized hardware only — plain steel will bleed black streaks through cedar and oak within a season. Shim to plumb before you drive anything home, and dry-fit a pair of brackets on the ground first so you can see how the profile reads at your actual viewing distance.
A Realistic Maintenance Rhythm
Decide up front whether you want color or patina. A pigmented penetrating oil or semi-transparent stain on a protected elevation generally wants refreshing every two to three years; full sun and driving rain shorten that. Left unfinished, cedar, cypress, and teak all weather toward gray, which is a legitimate design choice as long as it is intentional and consistent across the facade.
Twice a year, walk the house and do three things: brush debris out of the top surfaces of brackets and braces, check that fastener plugs are still tight and dry, and look for soft spots where a sprinkler or a downspout is hitting wood it shouldn’t. Spot-recoat early rather than waiting for a full strip. Timber accents are forgiving when water is managed and unforgiving when it isn’t, and a thirty-minute inspection in spring and fall is the entire difference between a detail that lasts decades and one you replace in five years.
Start With One Elevation
Resist the urge to bracket everything at once. Choose the elevation people see first — usually the entry or the street-facing gable — commit to one profile and one species, and live with it for a season before extending the vocabulary to the garage header or the patio posts. That is exactly how the storefronts you admired got there: a few well-proportioned pieces of wood, placed where the eye lands, cared for on a schedule.