Cedar Siding, Shingles and Shakes: How to Choose Wood That Still Looks Good in Year Twenty
Cedar is one of the few exterior materials that gets more interesting with age instead of merely older. Left alone, it drifts toward a soft silver-grey. Stained, it holds warm amber tones for years. Painted, it takes a brush better than almost any other wood siding. But cedar rewards planning and punishes guesswork — the same species, installed two different ways, can either outlast the roof above it or cup and split within a handful of seasons. If you are weighing cedar for a house, a cottage, a cafe facade or a backyard structure, here is what actually matters before the first course goes up.
Why cedar still competes with everything newer
Cedar’s advantages are physical, not fashionable. The wood is dimensionally stable, which means it moves less than most softwoods when humidity swings from a wet April to a dry August. It contains natural extractives that make it unattractive to decay organisms and insects. It is light enough to handle on a ladder without a second pair of hands, and soft enough to cut cleanly with ordinary carbide blades, which matters when you are scribing around a window head or a roof rake.
The trade-off is maintenance. Cedar is a coating-dependent material if you want it to keep a specific color. Expect to re-apply a penetrating stain every several years on sun-hammered elevations, and less often on shaded north walls. If you want zero upkeep, cedar is the wrong choice, and it is worth comparing it honestly against fiber cement, engineered wood and vinyl — a useful overview of the main house siding options and their trade-offs will tell you quickly whether your tolerance for upkeep matches the material.
Shingles, shakes and pattern siding are not interchangeable
Shingles
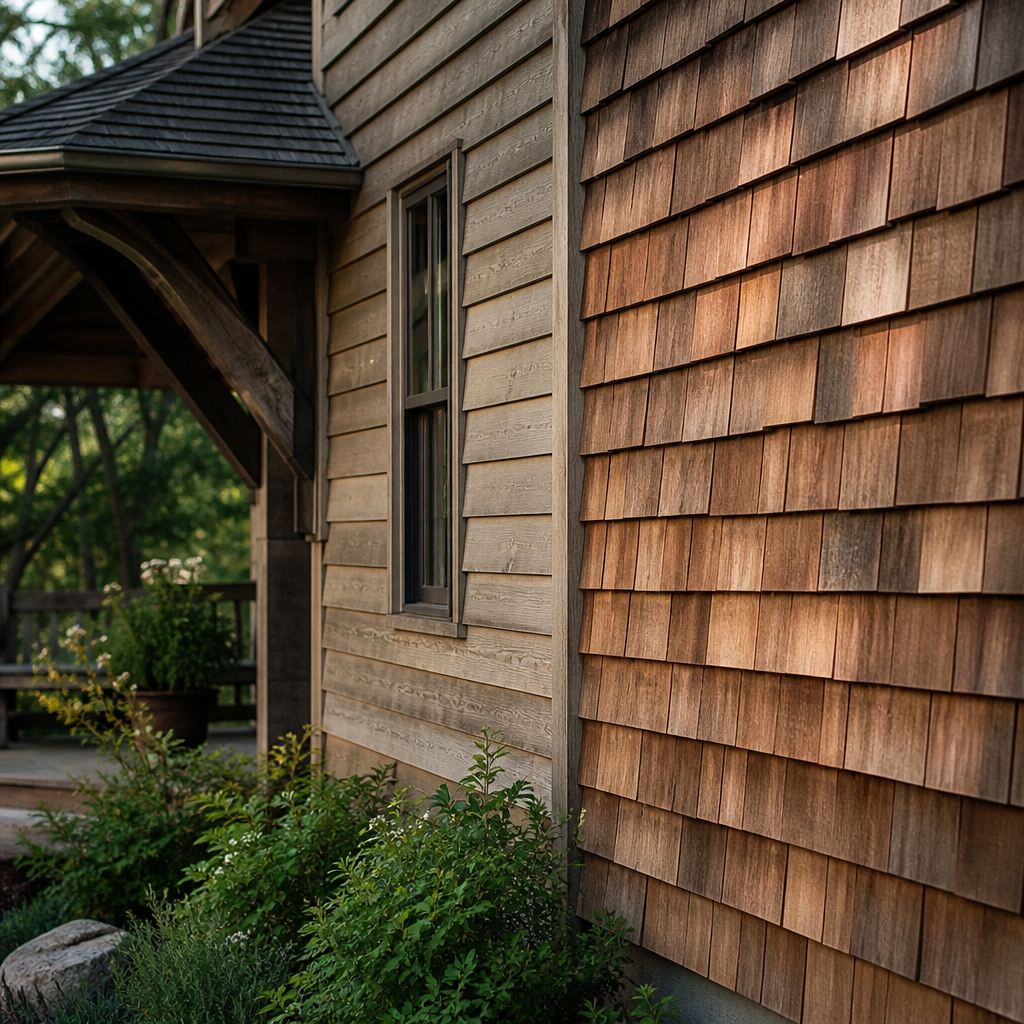
Cedar shingles are sawn on both faces, so they lie flat and tight. That makes them the right call for crisp coastal and shingle-style walls, for curved bays, and for anywhere you want a fine, regular shadow line. Because they are thin at the butt, they conform to gentle curves and tower walls with little fuss. Shingles are also the most forgiving material for complicated geometry — dormer cheeks, eyebrow windows, flared skirts — since you can taper courses and cut around obstacles without special trim.
Shakes
Shakes are split rather than sawn, at least on the face, which gives them a thicker butt and a rougher, more textured surface. They throw a heavier shadow and read as rustic rather than refined. On a lake cabin or a barn-form garage, that texture is the whole point. On a tight Federal-style facade, it can look busy. Shakes also need more generous exposure and more careful layout because their irregularity makes thin keyways harder to control.
Pattern siding
Pattern siding — bevel, shiplap, channel rustic, tongue-and-groove, board-and-batten — covers ground faster and gives you directional emphasis. Horizontal bevel widens a facade visually; vertical board-and-batten makes a narrow gable look taller. Shiplap and channel profiles handle wind-driven rain well because the overlap creates a drainage path. If you are mixing materials, a common and successful move is pattern siding on the main field with shingles in the gables, which breaks up a large wall without introducing a second species.
Species and grade: the decisions that set the ceiling on performance
Western red cedar is the familiar choice for siding, with a wide color range from honey to chocolate and a long length availability that reduces end joints on big walls. White cedar and Atlantic white cedar run lighter and tighter-grained, and are traditional on shingled walls where a weathered grey finish is the goal from day one. Timbers in cedar are a separate conversation again — brackets, porch posts, pergola beams and exposed rafter tails all live outdoors in full sun, so section size and detailing matter more than species romance.
Within any species, how the board was cut is the quiet variable. Vertical-grain material holds coatings longer and cups less than flat-grain. Knot content affects both appearance and the way stain reads across a wall. If the siding is going to be painted a solid color, the calculus changes; if it will be clear-coated or lightly stained, you want a consistent appearance across the whole order, which is why ordering everything at once from one source beats topping up later from a different batch.
Sourcing cedar without surprises
Cedar is a specialty product, and the difference between a smooth job and a frustrating one usually shows up at the delivery stage: wrong profile, inconsistent thickness, millwork that does not match the siding you already have on the wall. Working with a building materials supplier such as Liberty Cedar, which concentrates on cedar species and custom wood products — shingles, shakes, pattern siding, timbers, mouldings and custom millwork — means the trim, the field siding and the specialty pieces can be specified as one coordinated package rather than assembled from whatever three different yards happen to stock. For architects and remodelers matching an existing historic profile, the availability of custom millwork is often the deciding factor, because a replacement water table or a non-standard bevel cannot be faked with off-the-shelf stock.
Installation details that decide the outcome
- Back-prime or pre-finish everything. Coat all six surfaces, including cut ends, before the piece goes on the wall. Uncoated backs absorb moisture unevenly and cause cupping.
- Use stainless or hot-dipped fasteners. Cedar’s natural extractives react with ordinary steel and leave black streaks that no amount of washing removes.
- Nail once, in the right place. Each piece should be fastened so it can move with seasonal humidity rather than being pinned through two overlapping courses.
- Create a drainage plane. A rainscreen gap behind the siding, even a thin one, lets both faces dry and dramatically extends coating life, especially on shaded or weather-facing walls.
- Keep the bottom edge off the ground. Several inches of clearance above grade, decks and roof surfaces prevents splash-back and wicking.
- Let the material acclimate. Stacked flat and covered on site for a few days, cedar reaches an equilibrium that reduces post-installation movement.
Outbuildings are the best place to start
If you have never worked with cedar, a smaller structure is a low-risk place to learn the material. Shed walls, a pool house or the elevations of a new workshop give you real practice in layout, exposure and fastening without committing the whole house. Anyone already thinking through the footing, framing and permitting steps involved in building a detached garage on your property is in an ideal position to specify cedar from the start, because the cladding decision can be made before sheathing goes up rather than retrofitted later. A cedar-clad garage that matches the main house also does more for property appearance than almost any other single upgrade of its size.
Setting expectations for the long run
Decide early whether you want cedar to stay the color it arrives or weather naturally, because that single choice drives everything else: stain versus clear sealer, maintenance interval, and how much variation in the original material you can live with. Walk the elevations and note which walls take afternoon sun and which stay damp; those will age at different rates and need attention on different schedules. Keep a small quantity of matching material after the job for repairs, since nothing matches a ten-year-old wall better than siding from the same order. Handled that way, cedar stops being a maintenance obligation and becomes what it should be — a surface that keeps improving while the rest of the house catches up.