
How to Plan a Safe Home EV Charging Setup in Chicago, Illinois
Key Takeaways
- Base your charger choice on daily mileage, vehicle requirements, and available overnight parking time.
- Level 1 charging may suit light driving, while Level 2 offers faster charging for heavier use.
- Have a qualified electrician assess panel capacity, wiring, and potential electrical upgrades.
- Choose a charger location with safe cable reach and enough clearance from vehicles, walkways, and water.
- Compare plug-in and hardwired equipment based on flexibility, installation needs, and intended use.
- Use outdoor-rated equipment and proper cable management for garages, driveways, and exposed parking areas.
- Review electricity rates and smart charging features to help manage charging costs.
- Consider future needs, including a second EV, solar panels, battery storage, and additional electric appliances.
- Confirm applicable permits, inspections, and installation requirements before work begins.
For Chicago drivers, a home charging plan should account for more than the vehicle in the driveway. Daily mileage, parking layout, an older electrical panel, detached garages, and winter weather can all affect the right choice. Professional EV home charger installation Chicago services can help homeowners turn those details into a setup that is safe, convenient, and suited to their household. The best solution is not automatically the fastest charger. A practical setup gives the vehicle enough time to recharge while parked, fits within the home’s available electrical capacity, and keeps cables protected from snow, standing water, foot traffic, and vehicle tires.
Start With Daily Driving Habits
Begin with the miles driven on a typical weekday, not the largest charger available for sale. A driver who travels about 20 miles per day and parks overnight for many hours may have very different needs from someone who drives 70 miles daily, makes evening trips, or has an irregular schedule. Larger battery packs can also take longer to replenish. Think about when the car is actually at home. If it is parked in a garage or driveway from evening until morning, slower charging may be sufficient. If several household members share one EV, or the vehicle needs to be ready again within a few hours, a Level 2 setup may be more useful.
Choose the Right Charging Level
Level 1 Charging
Level 1 charging uses a standard 120-volt outlet and can be a sensible starting point for light driving or some plug-in hybrids. It is slower, but it may meet daily needs if the vehicle has plenty of overnight parking. The U.S. Department of Energy notes that many drivers can meet daily range needs by charging overnight with Level 1 equipment when a dedicated branch circuit is available near the parking location.
Level 2 Charging
Level 2 equipment uses a 240-volt circuit and is often a better fit for longer commutes, larger batteries, multiple EVs, or drivers who need quicker overnight replenishment. It usually requires a dedicated circuit and professional electrical work. The differences between Level 1 and Level 2 home charging are worth reviewing before choosing equipment, since the right power level depends on routine, budget, and home capacity.
In simple terms:
- Choose Level 1 when daily driving is modest, and the car has long overnight parking periods.
- Consider Level 2 when daily driving is heavier or charging flexibility matters.
- Do not buy a higher-output charger until the electrical system and vehicle requirements have been reviewed.
Check the Home’s Electrical System
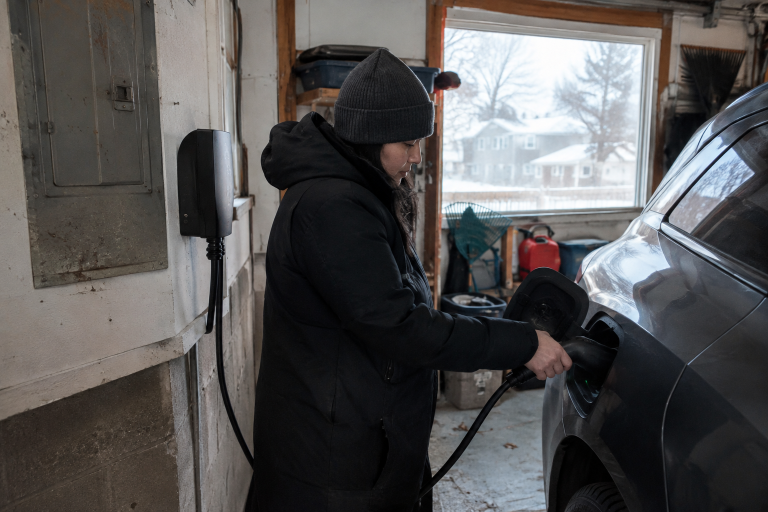
An empty breaker slot does not automatically mean a home can safely support an EV charger. The panel and service must also have enough capacity for the additional load. In Chicago homes, that assessment can be especially important where electric dryers, air conditioning, heat pumps, electric water heating, workshop tools, or other large appliances are already in use. A qualified electrician can perform a load calculation and review the service, panel, wiring path, breaker, and proposed charging output. If capacity is limited, possible solutions may include a lower-power charger, load-management equipment, a subpanel, or an electrical service upgrade. EV charging is treated as a continuous load under electrical code, so the circuit components must be selected as a complete, compatible system.
Pick a Practical Charger Location
Place the charger where the vehicle normally parks, not where it merely fits on the wall. Check the charge-port location on the vehicle, cable reach, garage-door movement, walking paths, and clearance around the car. A shorter route from the electrical panel can reduce installation complexity, but safe everyday use matters just as much. Keep the cable away from tires, sharp edges, stairs, busy sidewalks, and low areas where water collects. Chicago properties with detached garages or alley-access parking may need additional planning for the route between the service panel and charger location.
Compare Plug-In and Hardwired Setups
Plug-In Equipment
A plug-in Level 2 charger offers flexibility because the unit can be replaced without disconnecting the fixed wiring. However, the receptacle must be properly installed and suitable for repeated high-load charging. Heat, discoloration, a loose plug, or a damaged outlet are warning signs that should be addressed promptly.
Hardwired Equipment
A hardwired charger creates a more permanent installation and can be a strong option for outdoor locations or higher-output equipment. It also avoids a receptacle connection. The vehicle, charger, breaker, conductors, and installation method must still be matched correctly.
Plan for Outdoor Charging
Outdoor charging can work safely when the equipment is rated for weather exposure and installed correctly. Chicago winters make weatherproofing especially important. Choose equipment designed for outdoor use, mount it securely, provide protected cable storage, and keep the connection above areas prone to pooling water, snow buildup, or flooding. Extension cords and improvised adapters are not a reliable long-term charging plan. Before installing outdoors, confirm that the cable reaches comfortably, the route does not create a tripping hazard, and local permit and inspection requirements have been addressed.
Manage Charging Costs
Home charging cost depends on electricity use and the utility rate. A simple estimate is: charging cost = kilowatt-hours used × electricity rate. For example, if a fictional charging session uses 30 kilowatt-hours at a rate of $0.18 per kilowatt-hour, the energy cost is $5.40. Actual results vary with charging losses, vehicle efficiency, weather, and the utility plan. Where available, scheduled charging can shift charging to lower-priced time periods. The EPA recommends considering charger features such as scheduling, energy tracking, weather protection, cable length, and household electrical capacity before installation.
Prepare for Future Energy Needs
Plan beyond the first EV whenever possible. A household may later add a second electric vehicle, install a heat pump, replace gas appliances with electric models, or add solar and battery storage. Smart chargers and load-sharing systems may help coordinate major electrical loads without requiring every device to run at maximum power simultaneously. If a renovation is already planned, adding conduit or a future wiring path can make a later charger installation less disruptive. Keeping installation records, permits, equipment manuals, and receipts also makes future upgrades easier to evaluate.
Use a Safe Installation Checklist
- Review the vehicle’s charging requirements and the charger manufacturer’s instructions.
- Determine daily driving needs and realistic parking time.
- Have the electrical panel and service capacity assessed.
- Choose safety-certified equipment appropriate for indoor or outdoor use.
- Select a location with safe cable reach and clear walking paths.
- Use properly sized wiring, breaker protection, and a dedicated circuit where required.
- Confirm permit and inspection requirements before work begins.
- Test the completed installation and inspect cables and connectors regularly.
Common Questions About Home EV Charging
Can a regular outlet charge an EV?
Yes, a standard 120-volt outlet may charge an EV through Level 1 equipment. Whether it is practical depends on the vehicle, daily mileage, outlet condition, availability of a dedicated circuit, and overnight parking time.
Does every Chicago home need a Level 2 charger?
No. Level 2 charging is useful for many households, but some drivers can meet their needs with Level 1 charging. The right choice depends on routine and electrical capacity, not simply charger speed.
Can an EV charger be installed outside?
Yes, provided the charger, wiring, mounting method, and cable management are suitable for outdoor conditions, and the installation follows applicable local requirements.
Does a full electrical panel prevent installation?
Not always. A load calculation may identify options such as a lower-output charger, load management, panel modifications, or an upgrade. The answer should come from a qualified electrical assessment.
Conclusion
A safe and practical Chicago home EV charging setup should align with the driver’s daily routine, the home’s electrical capacity, the available parking, and any plans for future household upgrades. Before choosing a charger, homeowners should consider how many miles they typically drive, how often the vehicle needs to be recharged, and whether a garage, driveway, or outdoor parking area offers the most suitable installation location. They should also have a qualified electrician assess the existing panel, wiring, breaker capacity, and proposed circuit route to determine whether additional electrical work is necessary. For properties exposed to Chicago’s changing weather, selecting appropriately rated equipment and ensuring proper installation can help protect the charging setup from rain, snow, ice, and temperature fluctuations. It is also worth considering whether the household may add another EV, install solar panels, or upgrade other electrical appliances in the coming years. Addressing these details before installation can help prevent unexpected costs, improve everyday convenience, and support a more reliable charging experience. With the right equipment, professional installation, and thoughtful planning, homeowners can establish a charging routine that works through icy winters, busy workweeks, and the next stage of home electrification.